カメラの世界は広くて深い。
道具に頼りすぎてはいけないけど、機材が無いと撮れないのは確かで・・・特にエゾモモンガという特殊な条件での撮影はさまざまな制限があり、レンズやカメラ本体も適している物があリます。夜行性のモモンガを撮影するのは、カメラの性能を限界まで使用しないと成功しないですね。
光が少ないというのは、できる表現が限られるということ。その限られた条件で可愛いだけじゃないエゾモモンガの写真を撮れないかと日々試行錯誤と観察しています。
The world of cameras is vast and deep.
You shouldn’t rely too much on equipment—but at the same time, without the right gear, some shots simply aren’t possible. Especially when photographing Flying squirrels under such unique conditions, there are many limitations, and both the camera body and lenses need to suit the situation. Capturing these nocturnal animals often means pushing your camera’s performance to its very limits.
Low light means fewer ways to express what you see. Within those constraints, I keep observing and experimenting every day, searching for ways to capture Flying squirrels not just as “cute,” but as living creatures full of character and presence.
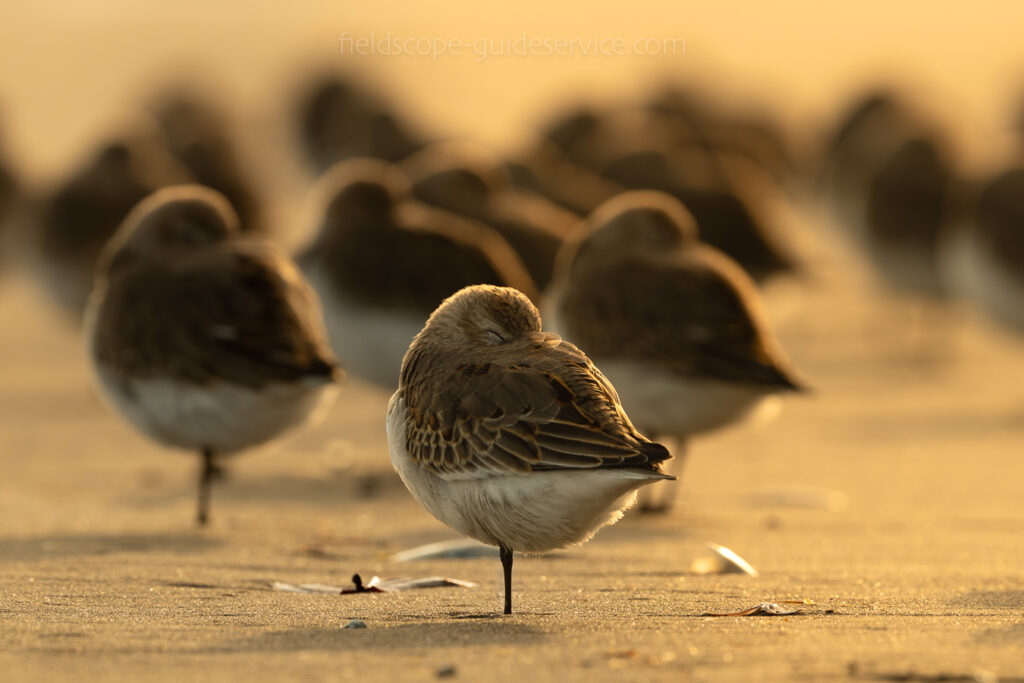
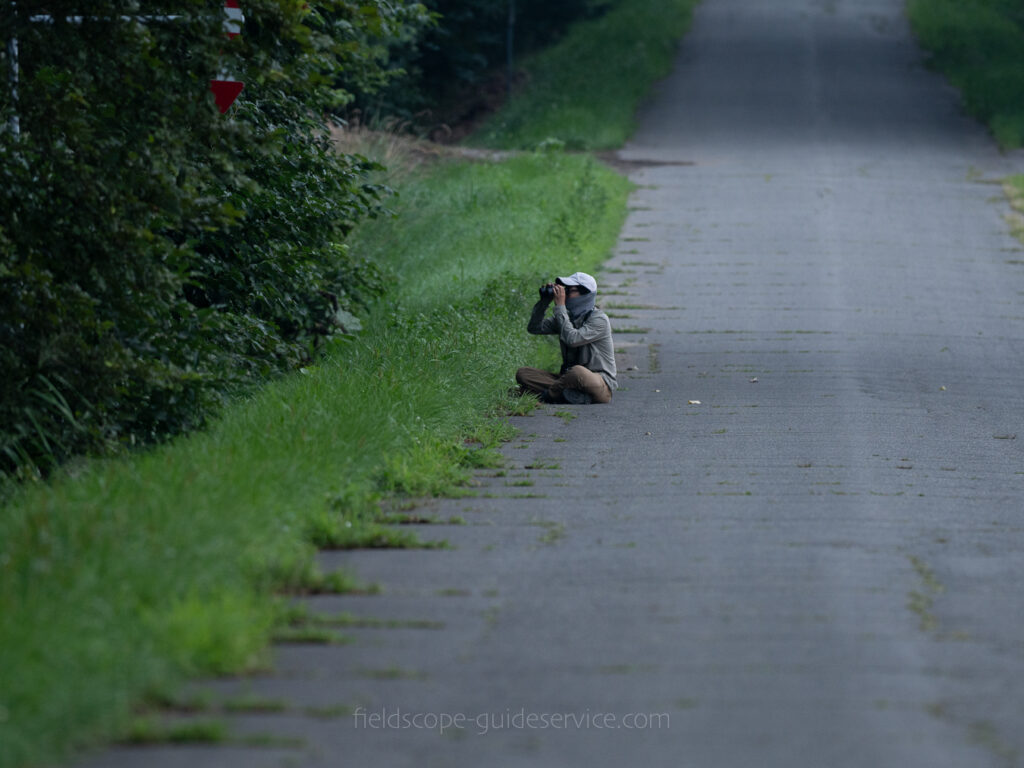
眠るメダイチドリにどこまで近づくことが出来るか、観察してチャレンジしてみると双眼鏡で見るだけでは気が付かなかった姿を発見することができました。波打ち際で秋の優しい午後の光を浴びて、彼らは片足で眠ります。時々大きめの波がくると海水が足を濡らして、よろめいたり目を開けて足を入れ替えたり。身体まで濡れることは無く、なぜかギリギリを分かっているようです。
起きている時は餌を取っていても10メートルも近づけないので今のところ待ち伏せしか方法は無く、人に慣れている個体を探す方が早いかもしれません。でも寝ている時は匍匐前進で少しずつなら5メートルまで近づけることが分かり、600mmのレンズでトリミング無しでこの写真が撮れました。
I wanted to see how close I could get to a sleeping Lesser Sand Plover, so I decided to observe and give it a quiet try. As I watched, I discovered details I’d never noticed through binoculars alone.
On the gentle autumn shore, they rest on one leg, bathed in soft afternoon light. When a slightly larger wave rolls in and the water touches their foot, they wobble, open one eye, and switch legs—yet somehow they always manage to stay just dry enough, as if they know exactly where the safe line is.
When they’re awake and feeding, you can’t get closer than about ten meters, so at the moment, the only way is to wait patiently—or perhaps find individuals that are used to people. But when they’re asleep, I learned that by slowly crawling forward, I could get as close as five meters. That’s how I managed to take this photo with a 600mm lens, without any cropping.
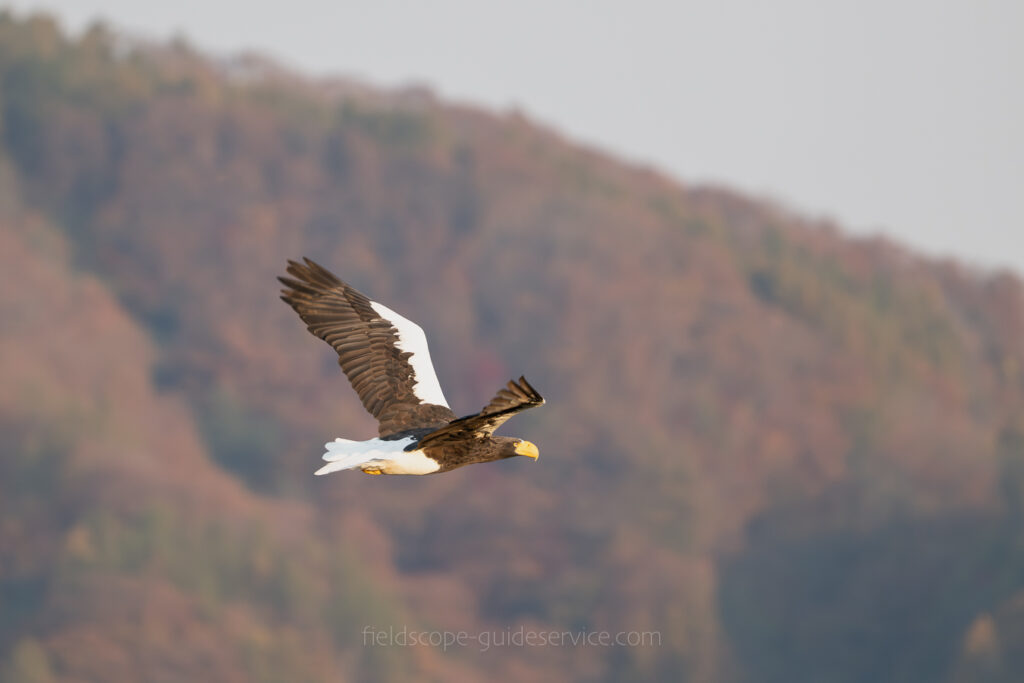
最新のミラーレスカメラのAF性能は確かにすごい。
鳥の飛翔はレンズを向けるだけで撮れるようになってしまったみたいで、一昔前にすごい!となった写真は今はお金を出せば撮れてしまう。野生動物の写真クオリティの基準が上がったので、ほとんどの人がちょっと食傷気味な気がします。SNSにはハイカロリーで高解像度な写真ばかりなので・・・。それでも自分が見た光景になるべく近い状態で写真に残して、少しでも感動を共有したいと思うのはやっぱりそれが表現だから?
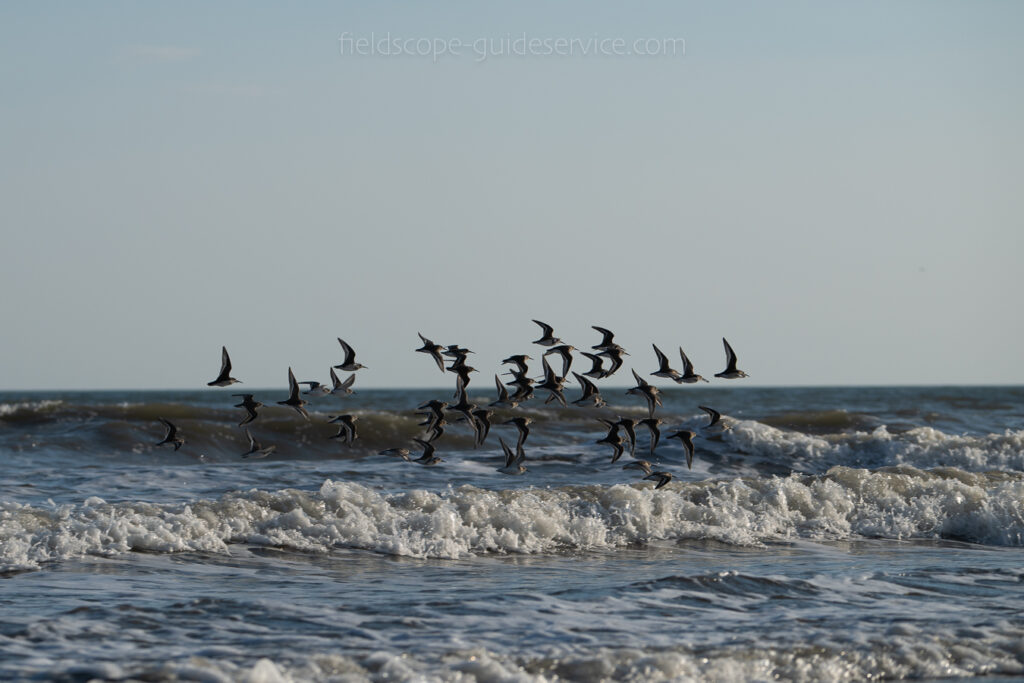
上の写真の群れで飛ぶチドリに被るように水平線が入っているのは、自分の中に印象強く残っている彼らの姿、光景とはちょっと違います。もっと綺麗で素晴らしかったなと思うので、また行って撮ってみようかとなります。
The autofocus performance of the latest mirrorless cameras is truly impressive.
It almost feels like you can capture a bird in flight just by pointing your lens. Photos that once amazed people a decade ago can now be taken easily—if you can afford the gear. As the overall quality standard for wildlife photography rises, I think many people are starting to feel a bit saturated. Social media is filled with high-resolution, high-impact images every day.
Still, I find myself wanting to record what I saw as faithfully as possible, to share even a small part of that feeling. Maybe that’s what “expression” really means.
In the photo above, the horizon cuts across the flock of plovers in flight. But somehow, it’s not quite the same as how I remember that moment—the scene was more beautiful, more alive. That’s why I feel like going back again, to try once more to capture it as it truly was.
エゾモモンガの撮影に使うレンズは最近は70-200mm,f2.8に落ち着きました。毎日見ているから近づけるという利点を活かし、しかもコンパクトに収まるので良いのですが、ゲストには300mm前後のレンズをお勧めしています。初めての巣穴で安定した時間にモモンガに出てきてもらうには、距離を取らざる得ないのです。でもゲストのサンニッパやヨンニッパ、ロクヨンなんかを横目で見ていると「わ〜すごい」と思うので、そういう余裕がある方は、ぜひ持ってきてください。
キャノンだとこの辺りのレンズ
・RF70-200mm F2.8 L IS USM Z
・RF24-240mm F4-6.3 IS USM
・RF75-300mm F4-5.6
ニコンならこの辺り
・NIKKOR Z 70-200mm f/2.8 VR S
・NIKKOR Z 100-400mm f/4.5-5.6 VR S
ソニー
・FE 70-200mm F2.8 GM OSS II
・FE 70-200mm F4 G OSS
・FE 70-300mm F4.5-5.6 G OSS
・FE 100-400mm F4.5-5.6 GM OSS
超高価格なレンズを除くと3社ではこんな感じでしょうか。
F4.0からは状況によっては厳しくなってくるので、こうしてみると凄く限られています。
それに加えて、撮影方法も少し変わっています。
僕のおすすめは完全マニュアルモードです。エゾモモンガは小さくて動くと早いのですが、常に素早く動き回っているわけではないので意外と落ち着いて設定の変更ができます。というより暗さの制限があるので”動き回る瞬間を手持ちで追いかけて撮る”ことは滅多に出来ません。枝や幹に留まり、じっとしている状態を狙うのが基本となります。
陽が沈むにつれて操作できる要素が減っていき、シャッタースピード、露出、ISOの三要素のうち最後はシャッタースピードのみでトライすることになります。
エゾモモンガの撮影方法 2025ver.
巣穴の前に着いたら三脚に乗せたカメラを巣穴に向け、ピントは穴の縁と暗い部分に跨るように置いておきます(暗くなった時にもピントが合いやすくなる&ピントの窓があると穴の奥の変化がわかりづらくなるので)。
リモコンがあるなら取り付けて、ポケットの中で操作できる状態にすると寒い日に手先が守れて、尚且つ無駄な動作が減るので気配を消すことができます。
測光方式をスポットや中心に設定して、AFエリアは最小にしておきます。
S/Sをその時の明るさを考慮した最高の速度にセットします。露出は解放か、もしくは一つ絞ります。この状態で液晶を確認しながらISO感度を可能な限り低く設定します。
ここまで出来たら、あとはほぼ動く必要はありません。モモンガが巣穴から出てくれることを祈りつつ、暗くなったら露出→ISO→S/Sの順に変更していくだけです。いずれ露出から順に限界となり、最後はS/Sのみの操作となります。ピントが合う限り撮影はできますが色味が落ちていきます。それでも肉眼で全く見えない状況でも撮影はでき、じっとしたモモンガなら1秒のS/Sでも髭先がブレる程度の写真が残せます。
ちょっとした撮影のコツは・・・
・遅いS/Sの中でピントが合った写真を撮るために、連写する
・モモンガは白いので顔さえ出れば全体の設定を少し上げることが出来る
・オートフォーカスが迷うようなら早めにMFに切り替えてピントを置いてしまう
・ISOを限界まで上げてAFを効かせてからMFに切り替え、ISOを下げる
The lens I use for photographing Flying squirrels has recently settled on a 70–200mm f/2.8. Taking advantage of the benefit of being able to get closer because I see them every day, and also because it fits compactly, it works well. However, I recommend lenses around 300mm for guests. To have the squirrels come out of their nest holes at a stable time on the first visit, it’s necessary to keep some distance. Still, when I glance at guests’ 300mm f/2.8, 400mm f/2.8, or 600mm lenses, I can’t help but think “Wow, amazing.” So if you have that kind of flexibility, please bring them.
For Canon, lenses around here:
- RF70-200mm F2.8 L IS USM Z
- RF24-240mm F4-6.3 IS USM
- RF75-300mm F4-5.6
For Nikon, around here:
- NIKKOR Z 70-200mm f/2.8 VR S
- NIKKOR Z 100-400mm f/4.5-5.6 VR S
Sony:
- FE 70-200mm F2.8 GM OSS II
- FE 70-200mm F4 G OSS
- FE 70-300mm F4.5-5.6 G OSS
- FE 100-400mm F4.5-5.6 GM OSS
Excluding ultra-expensive lenses, I suppose these are the options among the three companies.
From f/4.0 onward, depending on the situation, it becomes difficult, so when you look at it this way, the choices are quite limited.
In addition to that, the shooting method is also a little different.
My recommendation is complete manual mode. Flying squirrels are small and move quickly, but since they don’t move around constantly, you can actually change your settings rather calmly. Or rather, because of the limitation of darkness, it’s very rare to “chase and shoot their movements by hand.” The basic idea is to aim for the moment they stay still on a branch or trunk.
As the sun sets, the elements you can control decrease, and among the three factors of shutter speed, exposure, and ISO, in the end you will only be trying with shutter speed.
Flying squirrel photography method 2025 ver.
When you arrive in front of the nest hole, place your camera on a tripod and aim it at the hole. Set the focus so that it straddles the edge of the hole and the dark part inside (this makes it easier to focus even when it gets dark & if there’s a focus window, it makes it harder to notice changes inside the hole).
If you have a remote control, attach it and keep it so you can operate it in your pocket—this protects your fingers on cold days and reduces unnecessary movement, allowing you to erase your presence.
Set the metering mode to spot or center-weighted, and make the AF area as small as possible.
Set the shutter speed to the maximum possible considering the brightness at that time. Set the exposure to wide open, or stop down one step. In this state, while checking the LCD, set the ISO sensitivity as low as possible.
Once you’ve done this much, you almost don’t need to move. While praying that the squirrel will come out of the hole, as it gets darker, change in the order of exposure → ISO → shutter speed. Eventually, the limits will come from exposure onward, and in the end you will operate only shutter speed. As long as the focus is right, you can keep shooting, but the color tone will gradually fall. Even so, it’s possible to shoot in situations where you can’t see anything with the naked eye, and if the squirrel stays still, you can still get a photo at a 1-second shutter speed, with only the tips of the whiskers slightly blurred.
A few small shooting tips…
- To take a sharp photo with a slow shutter speed, use continuous shooting.
- Since the squirrel is white, once its face appears, you can raise the overall settings slightly.
- If autofocus starts to hunt, switch to manual focus early and pre-set the focus.
- Raise ISO to the limit to make AF work, then switch to MF and lower the ISO.

エゾモモンガの撮影がいかに縛りが多いか分かってもらえたでしょうか?
被写体認識が効くのはモモンガが巣穴から出てきて数分だけ、もしくは日によってはまったく使えません。メーカーが想定している状況と大きくかけ離れているようです。
AIが搭載されたカメラも、数百万円のレンズも、暗さとモモンガの前では性能は半分以上落ちる印象です。表現の幅がそれだけ狭く、だからこそ面白いのかもしれません。
もちろん、ここまでの話はとことん拘ったエゾモモンガを撮影したい人向けです。
こんなこと言うのもアレですが、時々カメラを放り出したくなることもあります。あまりにも素晴らしい自然の前ではファインダーを覗くことがバカらしく感じます。自分の目か双眼鏡で見るのことしかできない瞬間があり、そういう光景は写真に残せないものです。
Have you gotten a sense of just how many limitations there are when photographing Flying squirrels?
The subject-detection function only works for a few minutes after they come out of the nest hole—or depending on the day, not at all. It seems the conditions are far from what camera manufacturers had in mind.
Even cameras equipped with AI, or lenses worth several million yen, lose more than half of their performance in the darkness and in front of a Flying squirrel. The range of expression becomes so narrow—and maybe that’s exactly what makes it interesting.
Of course, everything I’ve said so far is for those who want to go all-in on photographing Flying squirrels.
To be honest, there are times I feel like throwing my camera aside. In the face of truly breathtaking nature, looking through a viewfinder sometimes feels meaningless. There are moments that can only be seen with your own eyes or through binoculars—scenes that simply can’t be captured in a photograph.
その瞬間がいちばん野生の世界に溶け込むことができて、ドキドキする時間です。
誰にも共有せず、胸にしまっておける瞬間です。
That moment is when I feel most connected to the wild — a heartbeat-quickening time when I truly melt into nature.
It’s a moment I don’t share with anyone, something I keep quietly to myself.